
Because of the space constraints at DOG Aviation, only one wing will be assembled at a time. The left wing will be assembled first only because the left spar was on the top in the spar crate. The AEX tie down extrusion was first on the day’s agenda beginning with drilling out the holes on both ends to prepare the holes for being tapped. Decided to go ahead and tap out both holes as suggested in the drawings … even though the likelihood of using a tie down ring on the top of the wing is very remote. But if a tie down ring is needed on the top of the wing for transport, the threads will be there.

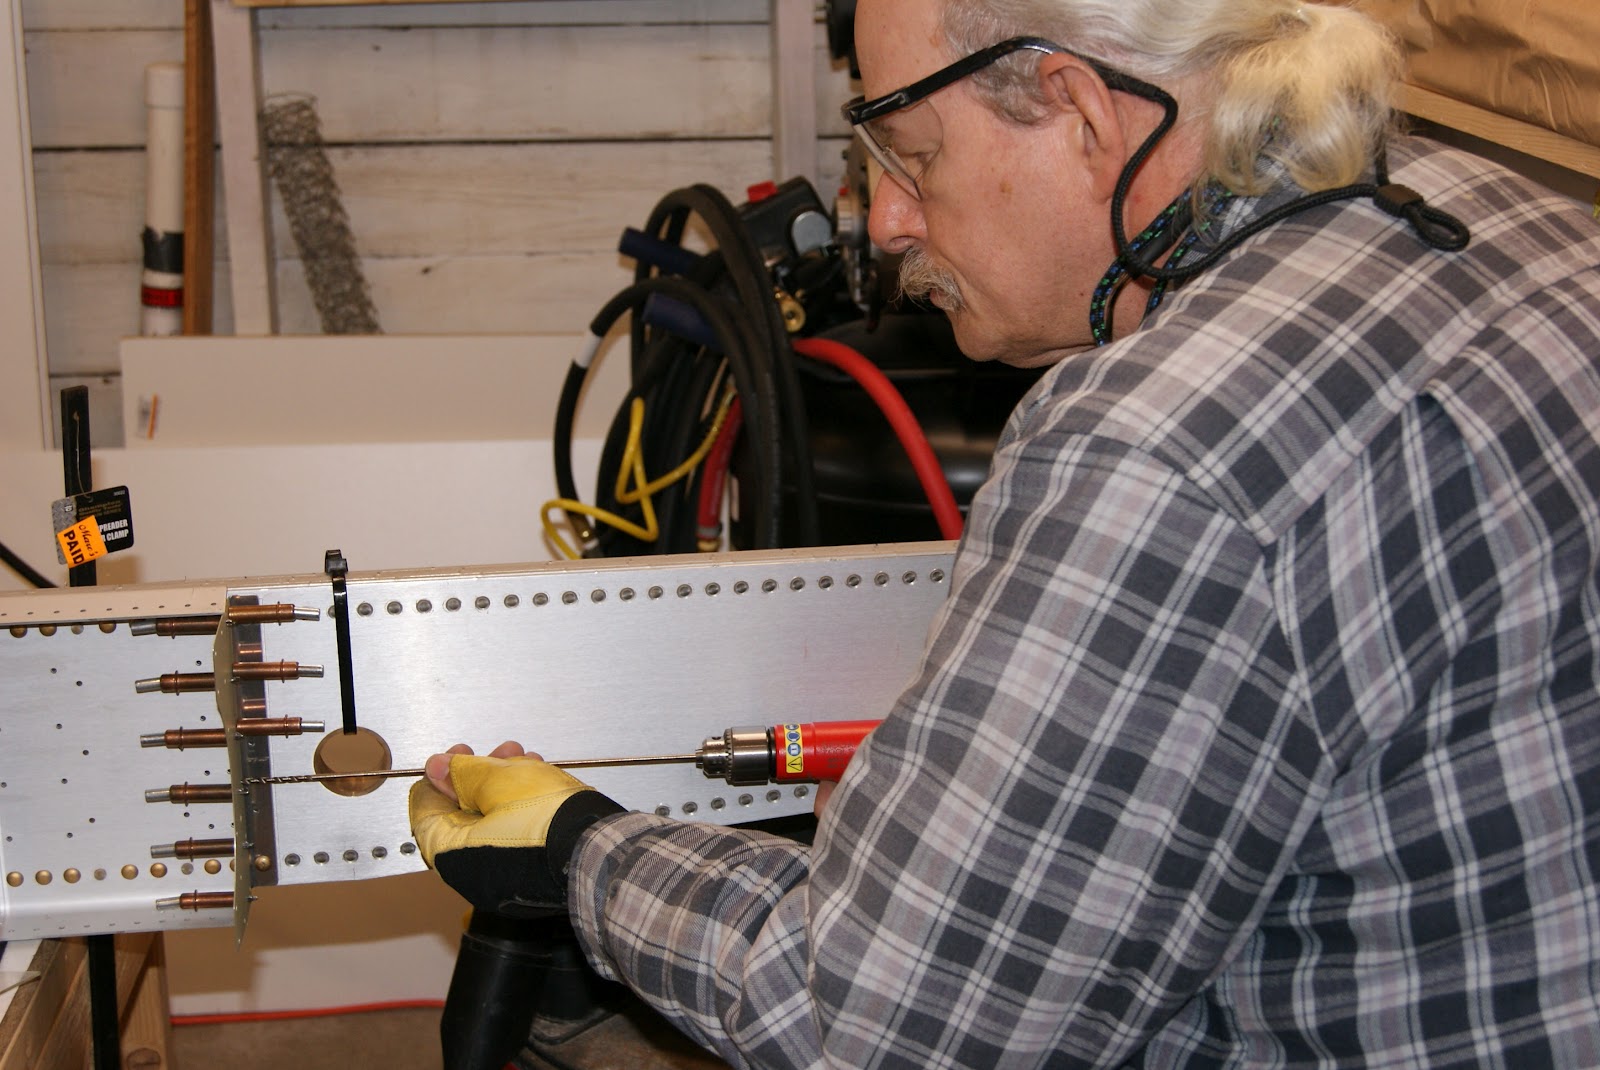
The plans call for separating some doubler plates which become a left and a right … this was done earlier prior to priming. The left doubler plate has an extra row of holes on it and needs to be clecoed onto the left spar’s inner most rib attach clip which has already been installed at the factory. Once the doubler is clecoed in place, the rib clip on the spar is match drilled to the extra row of holes on the left doubler plate. An extra long drill bit is used so it can be slightly flexed to get straight onto the hole. Using a short drill bit would place the bit on an angle because the drill body will be touching the spar keeping the drill at an angle.
There are ten rib attach clips that get clecoed onto the fore and aft of the left spar and will be riveted during the next work session.

Where the spar narrows at the outboard end, an angle is riveted onto it … this creates a surface to rivet the skin onto at the outer end of the spar. Because I’m planning on using flush rivets on the outer skins, the rivet holes on the angle where the outer skin will attach required dimpling before riveting it in place. AN470AD4-4.5 solid rivets were used here in the place of the LP4-3 pop rivets called for in the plans.
